FROM THE WEEKEND: TOP PICKS FOR FEBRUARY

Whether you love or despise Valentine's Day, Fairly Modern has put together some inspiration for your February home decor! I'm also thrilled to include our super talented and local friends at Blacklamb and Sweaty Wisdom in this month's post! 

1A. Polka Dot Pillow Cover // TayloredWhimsy on Etsy $15.00
1B. Love You Pillow // BrightJuly on Etsy $55.00
2. Love is Us 8x10 Art Print  // SweatyWisdon on Etsy $20.00
3. Threshold Tufted Ottoman Pink and Gold // Target $62.99 (Sale)
4. Threshold™ Ranunculus and Peony Arrangement in Gold Glass Vase 9" // Target $19.99
5. I Think I Am In Friend-Love With You By Yumi Sakugawa // Urban Outfitters $13.99
6. LE FEU DE L’EAU PROFOUND ROSE CANDLE // Blacklamb $57.00
7. Crosley AV Room Portable USB Record Player // Urban Outfitters $160.00
8. Canvas Home Large Platinum Dauville Porcelain Bowl // Blacklamb $25.00
9. Lodge Stripe Wool Throw Gray // Faribault Woven Mill Co. $135.00

See all of these lovely looks on Pinterest


1A: Printed Arrow Pillow Cover // 5CHomeDecor on Etsy $14.99
1B: Printed Geometric Heart Pillow Cover // 5CHomeDecor on Etsy $14.99
2. Fuck it 8x10 Print // SweatyWisdom on Etsy $20.00
3. Eames Molded Plastic Rocker // Design Within Reach $519.00
4. Never Have I Ever: My Life (So Far) Without A Date By Katie Heaney // Urban Outfitters $14.99
5. Pink Skull Candle Holder // hodihomedecor on Etsy $26.00
6. Metallic Gold Arrows with Animal Print // Fletcherandfox on Etsy $68.00
7. Henrika Throw in Black // Ikea $14.99
8. Tatine Love that Burns Candle // Blacklamb $16.00

See all of these anti-lovely looks on Pinterest


Angela SatterleeComment
BASEMENT UPDATE: PAINT, PAINT, AND MORE PAINT

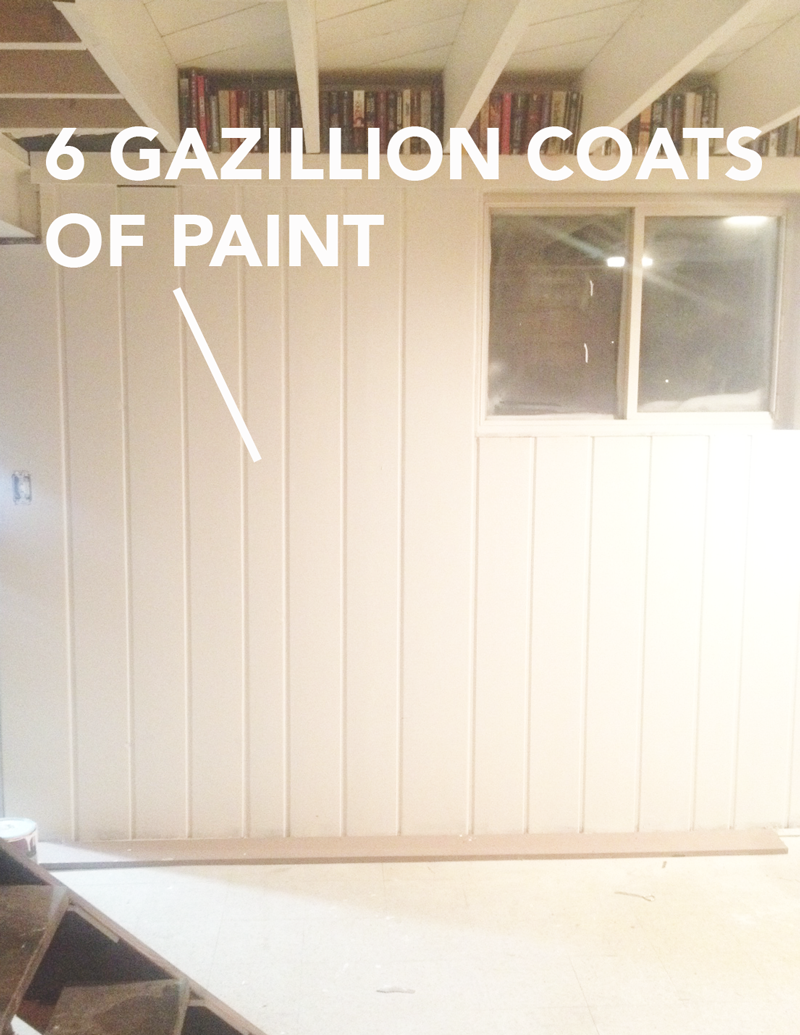
So I hate to leave you all hanging on the posts this week, but I have officially started painting and trimming our basement! Over the past 3 nights, a paint sprayer disaster, and six gazillion coats of paint (ok, so two coats of primer and 4 coats of white = 6 gazillion) I have...drum roll please...ONE wall finished! 

I quickly learned that knotty pine is a real b**** to paint, but it is looking fabulous and hopefully we can get this room done on the cheap as I had originally set out to do. 

In the meantime, hang in there and I promise the results will be worth the wait.

XO, Fairly Modern

basement.png
FROM THE WEEKEND: THE URGE TO PURGE

Over the past six months, the basement has seriously turned into an episode of hoarders as it slowly became a dumping ground for all of our unpacked boxes, laundry, tools...you name it. I've been feeling pretty anxious about all of the clutter and my urge to purge kicked in on Saturday where I spent the entire day taking load after load to Salvation Army. Our garage, future family room, office area, and laundry room are now nearly empty....and OMG. It feels amazing. 

Now that all the clutter is gone, I can now make some good weeknight progress prepping the basement family room/ tv room for painting! I know we will be spending a TON of time down here, so I'm excited to get this project rolling. Stay tuned - we have BIG plans for this space!

basement_before1.png
basement_before2.png


BEHIND THE SCENES: MEET FRANK!

Welcome to the other side of my blog posts. Yep, this is my little night owl and partner in crime, Frank! I realized after several references that some people might start to think that this is just some dude that lives here, eats weird stuff and licks the couch. So, I thought he needed a formal introduction.

meetfrank.png

For those of you that go way back with Mr. Frank, you can remember what my life was like when he use to do not-so-cute things like this: 

Frank_pillows.png

Thankfully, those days are over and after a summer in doggie bootcamp (literally), he really has grown to be quite the perfect dog.

He is such a huge part of our family that our lives would be pretty boring without him. Without kids – it's safe to say that Frank is pretty spoiled (I mean, really. The dog has his own post) and certainly has the most photos picked out for our photo wall project. He is such a hoot, isn't he? 

ikeaframefrank.png

So, that's Frank! You will be seeing him much more as the blog continues to grow. He loves to supervise every little thing that we do and keep us within sight at all times, so he's bound to make another appearance as our projects continue. 

KITCHEN UPDATE: WHAT'S NEXT?

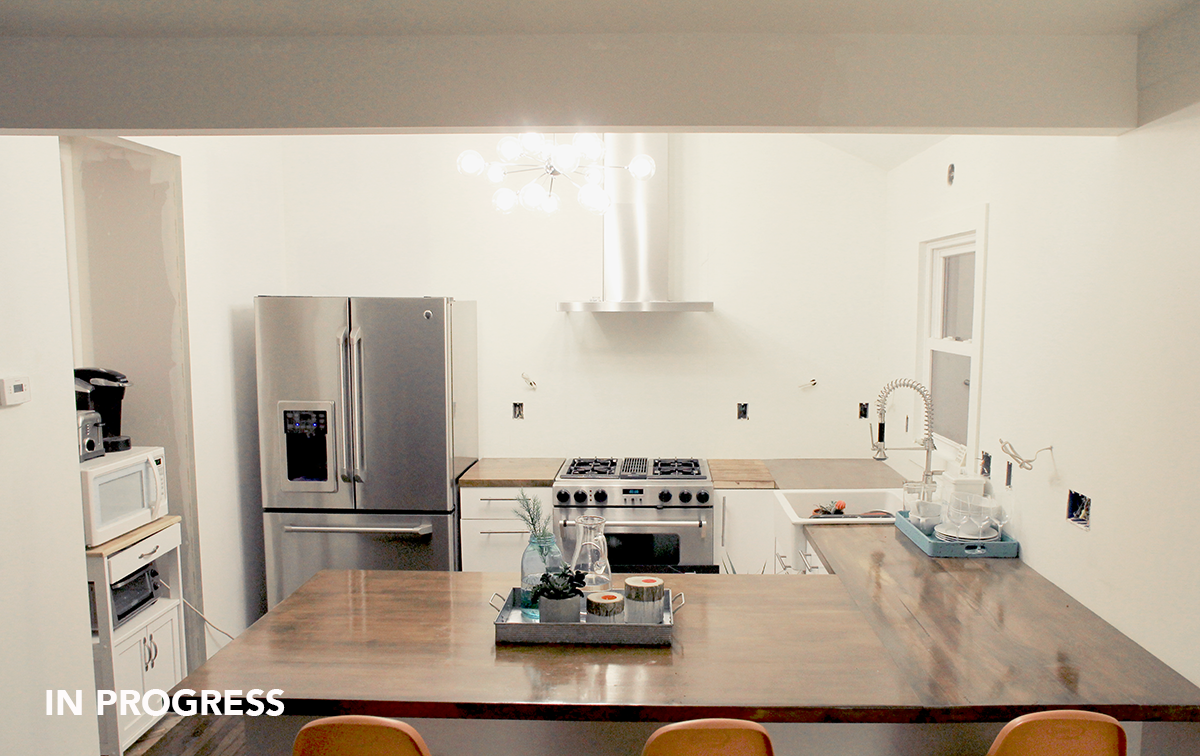
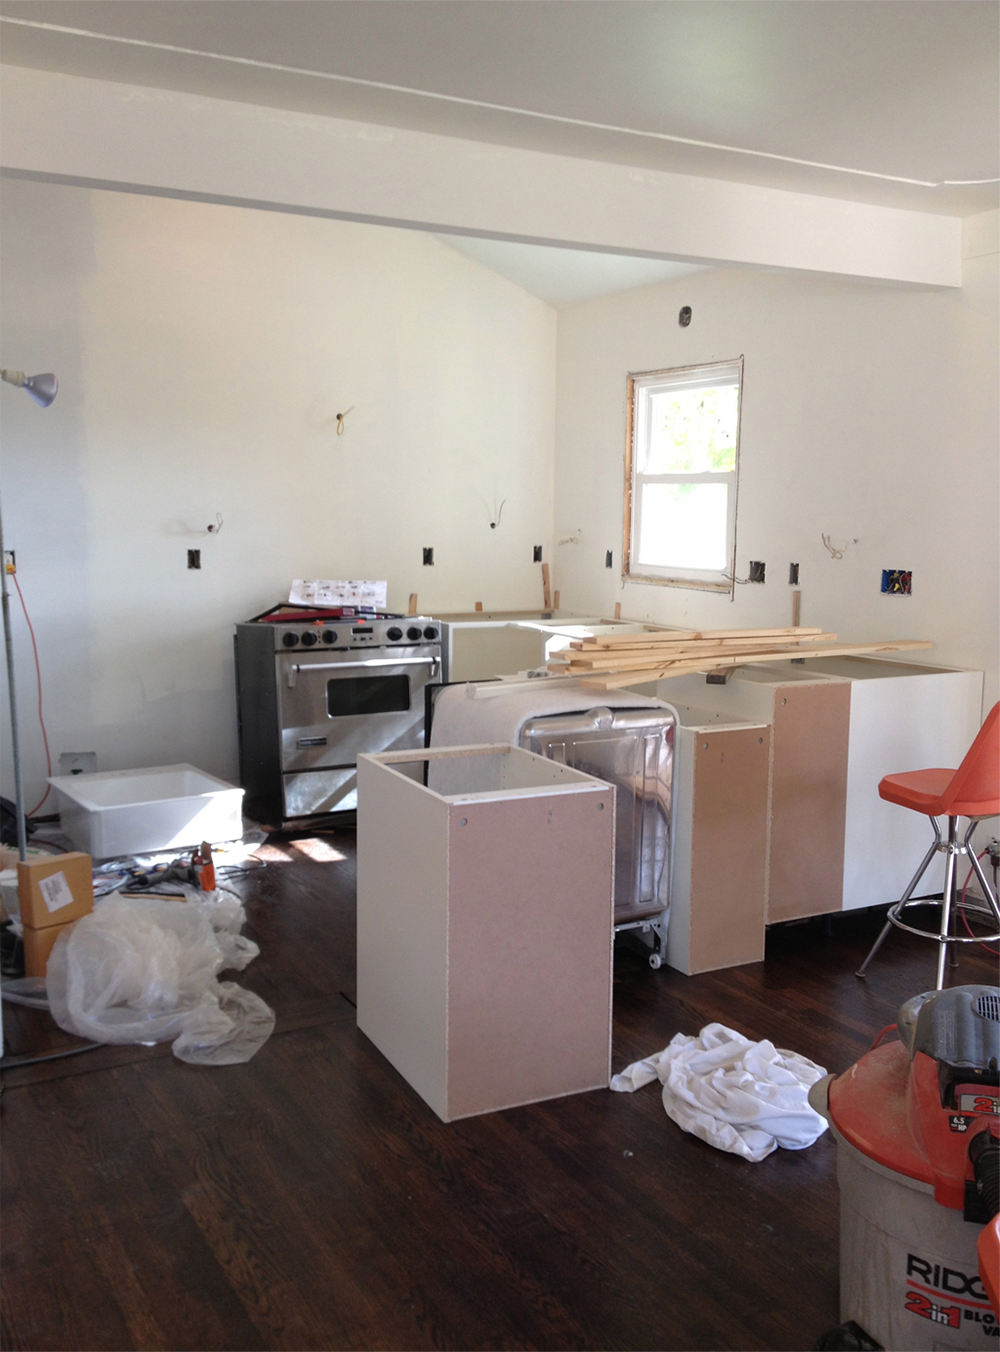
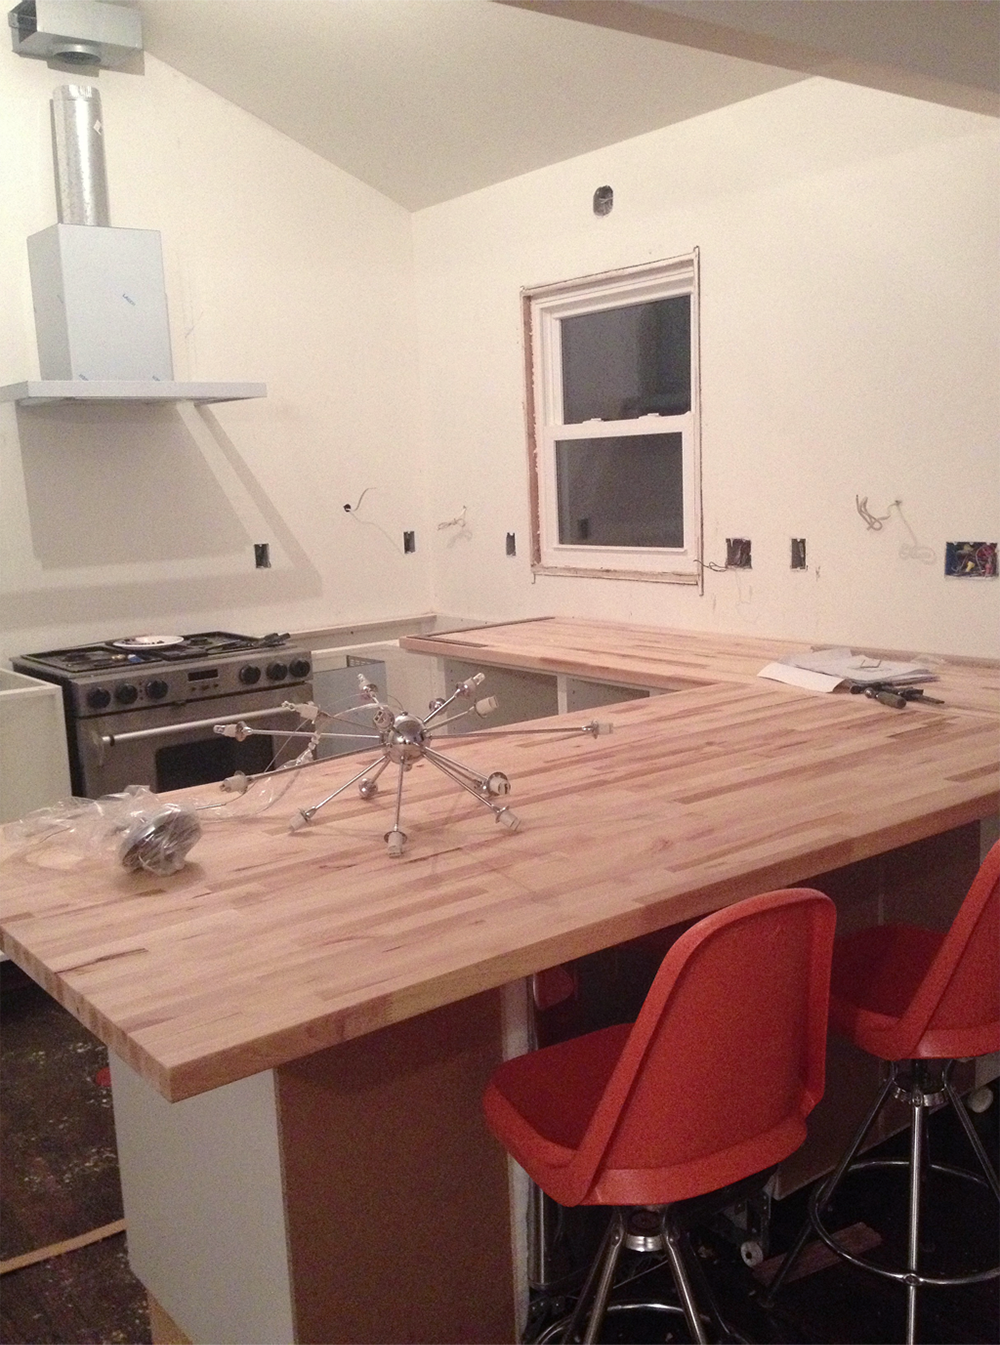
Our New Years post gave you a glimpse into the latest updates for our kitchen. While we've come a long way, there is plenty more to do before it's complete! Since we decided against installing upper cabinets, all of our dishes are boxed up in the basement until the floating shelves are installed. My dad came over to take measurements for them today, so hopefully over the next few weeks we will have those up! 

In the meantime, I decided to make a visual checklist for the rest of our kitchen to-dos. It's fun to see how we will be pulling it all together once the details are finished. I'm most excited about the sliding door my sister will be making for our pantry! She does some AMAZING work with reclaimed wood (if anyone is looking for a headboard, she's your gal.) 

I really love working out the final details of a project, so stay tuned for the finished look!

kitchen_progress.png
kitchen_after.png
Angela SatterleeComment
DESIGN CONFESSIONS: I PUT A BOOKSHELF IN FRONT OF A WINDOW

Ok, so remember the post-holiday makeover advice? In addition to taking down the tree and sprucing up with decor, I've really been wanting to bring Brandon's record collection out of the basement. I feel like they've been risked to destruction long enough and I would feel sick if anything happened to them. I know some of you were aware of my no-wall space dilemma, so before you all go and start with your comments in the footer, I'll just lay it all out there.

I put a bookshelf in front of a window. 

BLOG_bookshelfinwindow.png

Yep, I did it. Bookshelf in front of window, done and done. Now, there was some deep thought into this prior to me hauling a bookshelf and ten boxes of records up the stairs, so just stay with me. The original plan for the living room was to remove the small windows directly right and left of the fireplace (hence why they are still the old windows), add bookshelves, and update the mantle to end up with something like this:

Living-Room_remodel.png

We continually debate this concept due to the loss of natural light, but having more privacy and places to actually put things (cough, more decor!) just makes more sense to me considering we also have double bay windows. Thanks to Jenna from SAS interiors for the reassuring answer to my google search! She recently made a similar decision and informed her readers to pull the shade down first. From the outside – you would never know! 

We're not sure when we will be tackling this project, but it falls somewhere after bathroom, sunroom, basement, and the backyard makeover.

Maybe I should just look into getting another bookshelf.


Angela SatterleeComment
TOP PICKS: POST HOLIDAY DECOR

It has arrived. My least favorite time of the year when I am forced by my husband to take down my holiday decor. If given the the chance, I would certainly leave everything up until Valentines Day. I even tried to compromise by offering to take the ornaments off IF I could leave the tree up...

Didn't work.

Anyway, I know this time of the year can be super tricky to decorate for. It's that awkward time between snowpocalypse and spring (at least for us here in the Midwest) where you still want your home to feel as cozy as it did around the holidays. If you're anything like me...you'll be spending a lot of time indoors, so pack up that mistletoe and prepare yourself to beat those winter blues with some of my favorite post holiday items.

Blog_winterdecor.png
winterdecor2.png

1A. Selena Grey Strip Pillow from Crate and Barrell $59.95
1B: Wool Turkish Sham Pillow from Pillow Number One on Etsy $49.95
2. Wood Sign by Lily Bug Boutique via Etsy or Facebook
3. Faux Deer Antlers by Near and Deer on Etsy
4.Christien Meindertsma's Knitted Flocks Pouf from Design Within Reach
5. Trellis Mercury Hurricanes from West Elm $39
6. Threshold Faux Succulent Arrangement Target $19.99
7. Softest Throw Stripe in horseradish/ivory by West Elm $49.00
8. Design Sponge at Home by Grace Bonney Amazon $35.00

Screenshot 2014-01-16 01.26.52.png
Angela Satterlee Comment
MINI SESSION REVEAL!

I've been dying to post this after taking in emails of excitement from Molly over the results! For those that have asked, the answer is... yes! I am now offering mini-sessions for your interior design needs. This is something that I've been doing for a while now (for friends, referrals and home staging) and love it so much that I'm going to continue.

If you are interested in a mini-session, I have 2 hour slots available for Saturdays and Sundays (only). Please inquire at fairlymodernhome@gmail.com

Click here to read all about Molly and Marks Mini-Session!

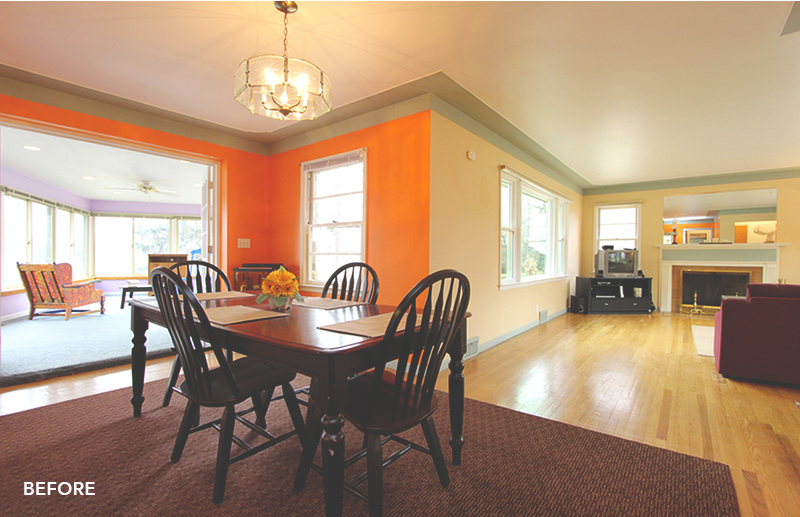
Smithgull_Living Room_beforeafter.png
Dining-Room_before-and-after.png
Angela SatterleeComment
STAIR PROJECT UPDATE

It's crazy to think that five months ago, the stair project was simply tape on the floor! Moving the stairs was a big decision, but certainly the best one. For materials, we researched our options for months and had a hard time finding anything within our budget that achieved the look we wanted.

See plans for moving the stairs here!

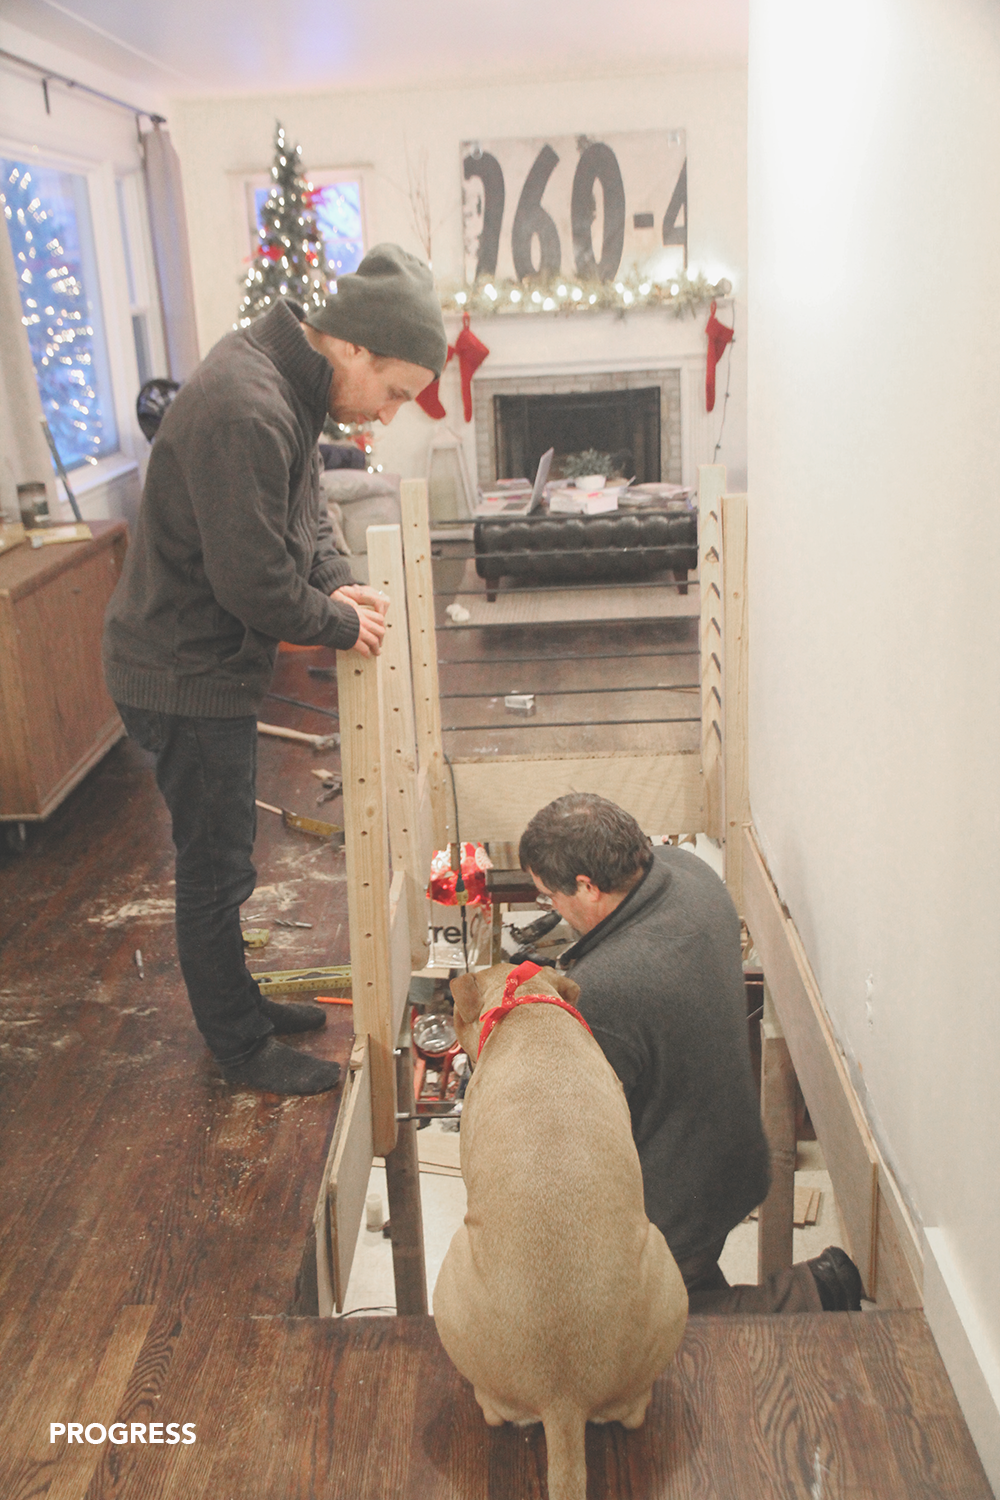
Behold, Rebar! This insanely cheap material allowed us to complete our stair railing project for UNDER $100 (Yep, you read that right). While the materials were cheap, I can take no responsibility for this project. My dad spent many of hours in his woodshop working on the posts, trim, and railing and we are SO, SO happy with the results!

We still need to stain, finish the trim, and complete the actual stairs...but, you get the idea!

stairs_before_0.png
stairs_before_1.png
stairs_before_2.png
stairs_progress_3.png
stairs_progress_4.png
stairs_meanddad.png
KITCHEN NOOK

Well, the stair project is finally underway (hooray!). As the rest of the house feels more and more complete, this was certainly becoming an eyesore (and over-sized coat/bag/towel rack) in our living space.

stairs_before.png
stairs_dad_progress.png

I could only be so much help to my dad on the stairs since this project requires experience and major carpentry skills, so I decided to tackle our kitchen nook that resides next to the staircase. One of our BIG ongoing projects is replacing all of the old trim with new. I absolutely love the trim and it makes a huge difference in the overall aesthetic, but it does take forever. Since I haven't done any windows on my own, I thought this would be a great project to work on because my dad was nearby to answer questions. 

Here is the BEFORE + AFTER progress of our kitchen nook!

dining_before_1.png
dining_before_2.png
dining_progress_v3.png
dining_after1.png
dining_after2.png

And there you have it! I love this little spot as a multi-use space for friends to hang while we're cooking dinner or a place to hang wireframes as I work from home. I'm thinking of adding baskets under the bench for extra storage, so stay tuned as this area progresses!

Angela SatterleeComment
HAPPY NEW YEAR! Living Room, Kitchen + Hallway Updates

Needless to say, the Satterlee's went through some major changes this year! We are finally settling down in our new home, despite the continuous renovations. I've had many requests for more updates and photos, so here is where we landed for 2013 after 5 months of renovations! We still have a ways to go, but are loving how everything is coming together. Cheers to another year of (much smaller) home projects! 

LIVING ROOM PROGRESS:

NYE_fairlymodern_living.png
NYE_Fairly-Modern_hallway.png
NY_fairlymodern_kitchen.png

HALLWAY PROGRESS:

hallway_before_1.png
hallway_before_2.png
hallway_after_1.png
hallway_after_2.png

KITCHEN PROGRESS:

kitchen_before_1.png
kitchen_before_2.png
kitchen_before_3.png
kitchen_before_4.png
kitchen_progress_5.png
kitchen_progress_6.png
kitchen_progress_7.png
kitchen_progress_8.png
kitchen_after_1.png
kitchen_after_2.png
kitchen_after_3.png
INSULATION + DRYWALL

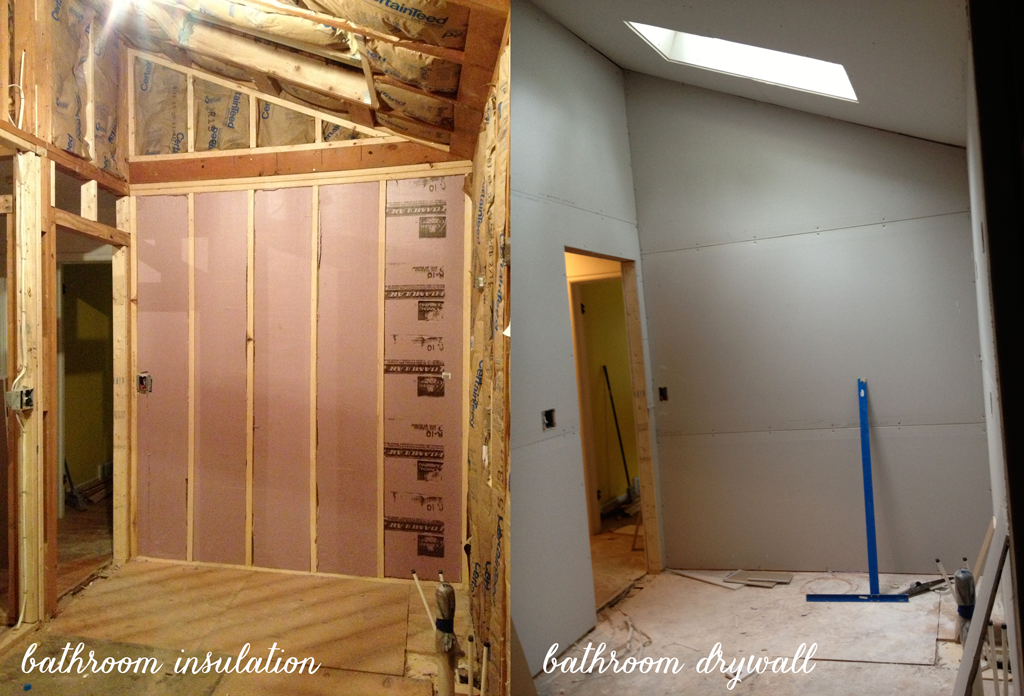
Behind all of this girl power was a TON of help and butt busting from my dad, my future bro-in-law (Curtis), and my sister (Abbie). We were on a tight deadline to get this place insulated before the dry wall guys came and it certainly would not have happened without them. 

It is an incredibly itchy job, so I'm sure they weren't thrilled to hear thats what we'd be doing, but they were total troopers! On top of that...none of us have ever insulated for a cathedral ceiling before. With some advice from Lee and this handy video...it allowed us to get the air-flow we needed to make it happen. 

Needless to say, we learned a ton...and are also glad it's over.

I know I seem totally crazy, but there were a few things I was not willing to learn and drywall/finishing was certainly one of them. Not to mention, as soon as we were finished...the drywall guys started and finished the next day. It was SO crazy to stop home on lunch and have walls! Here are some progress photos:

IMG_2509.png
IMG_2510.png
Angela SatterleeComment
NEW WINDOWS

Thanks for your patience on the blog, folks! Between work, teaching, and my masters class....any extra time I had was dedicated to project move-in!  So...where did I leave off?

Oh, yes. Windows.

Thankfully, our dad was co-owner of Ostrander Siding and Roofing, so I take zero credit in this process. He handled all of the measuring, ordering...and not to mention he and my mom installed them while I was at work. They made a HUGE difference and we were so happy to have all the help! They look amazing!

Since the house already had some new windows...we stuck with the white vinyl to match. In my opinion, it looks a little heavy with the brick, but we're thinking ahead to next spring when we bust out the paint and the brick color goes buh-bye.  We also added a skylight in the bathroom which we're both obsessed with.

Here is a peek at his (Lee's) handy work!

IMG_2453.png
Angela SatterleeComment
BATHROOM UPDATES

As some of you know, there were some major changes to bathroom. It started out as your standard size sharing the outer wall with a pantry kitchen and gradually landed on its 7' x 14' glorious self. The fact of the matter was, we've always had a bathroom battle with our shared schedule and we're happy we landed on a layout (and space) that will work for both of us! 

BATHROOM.png

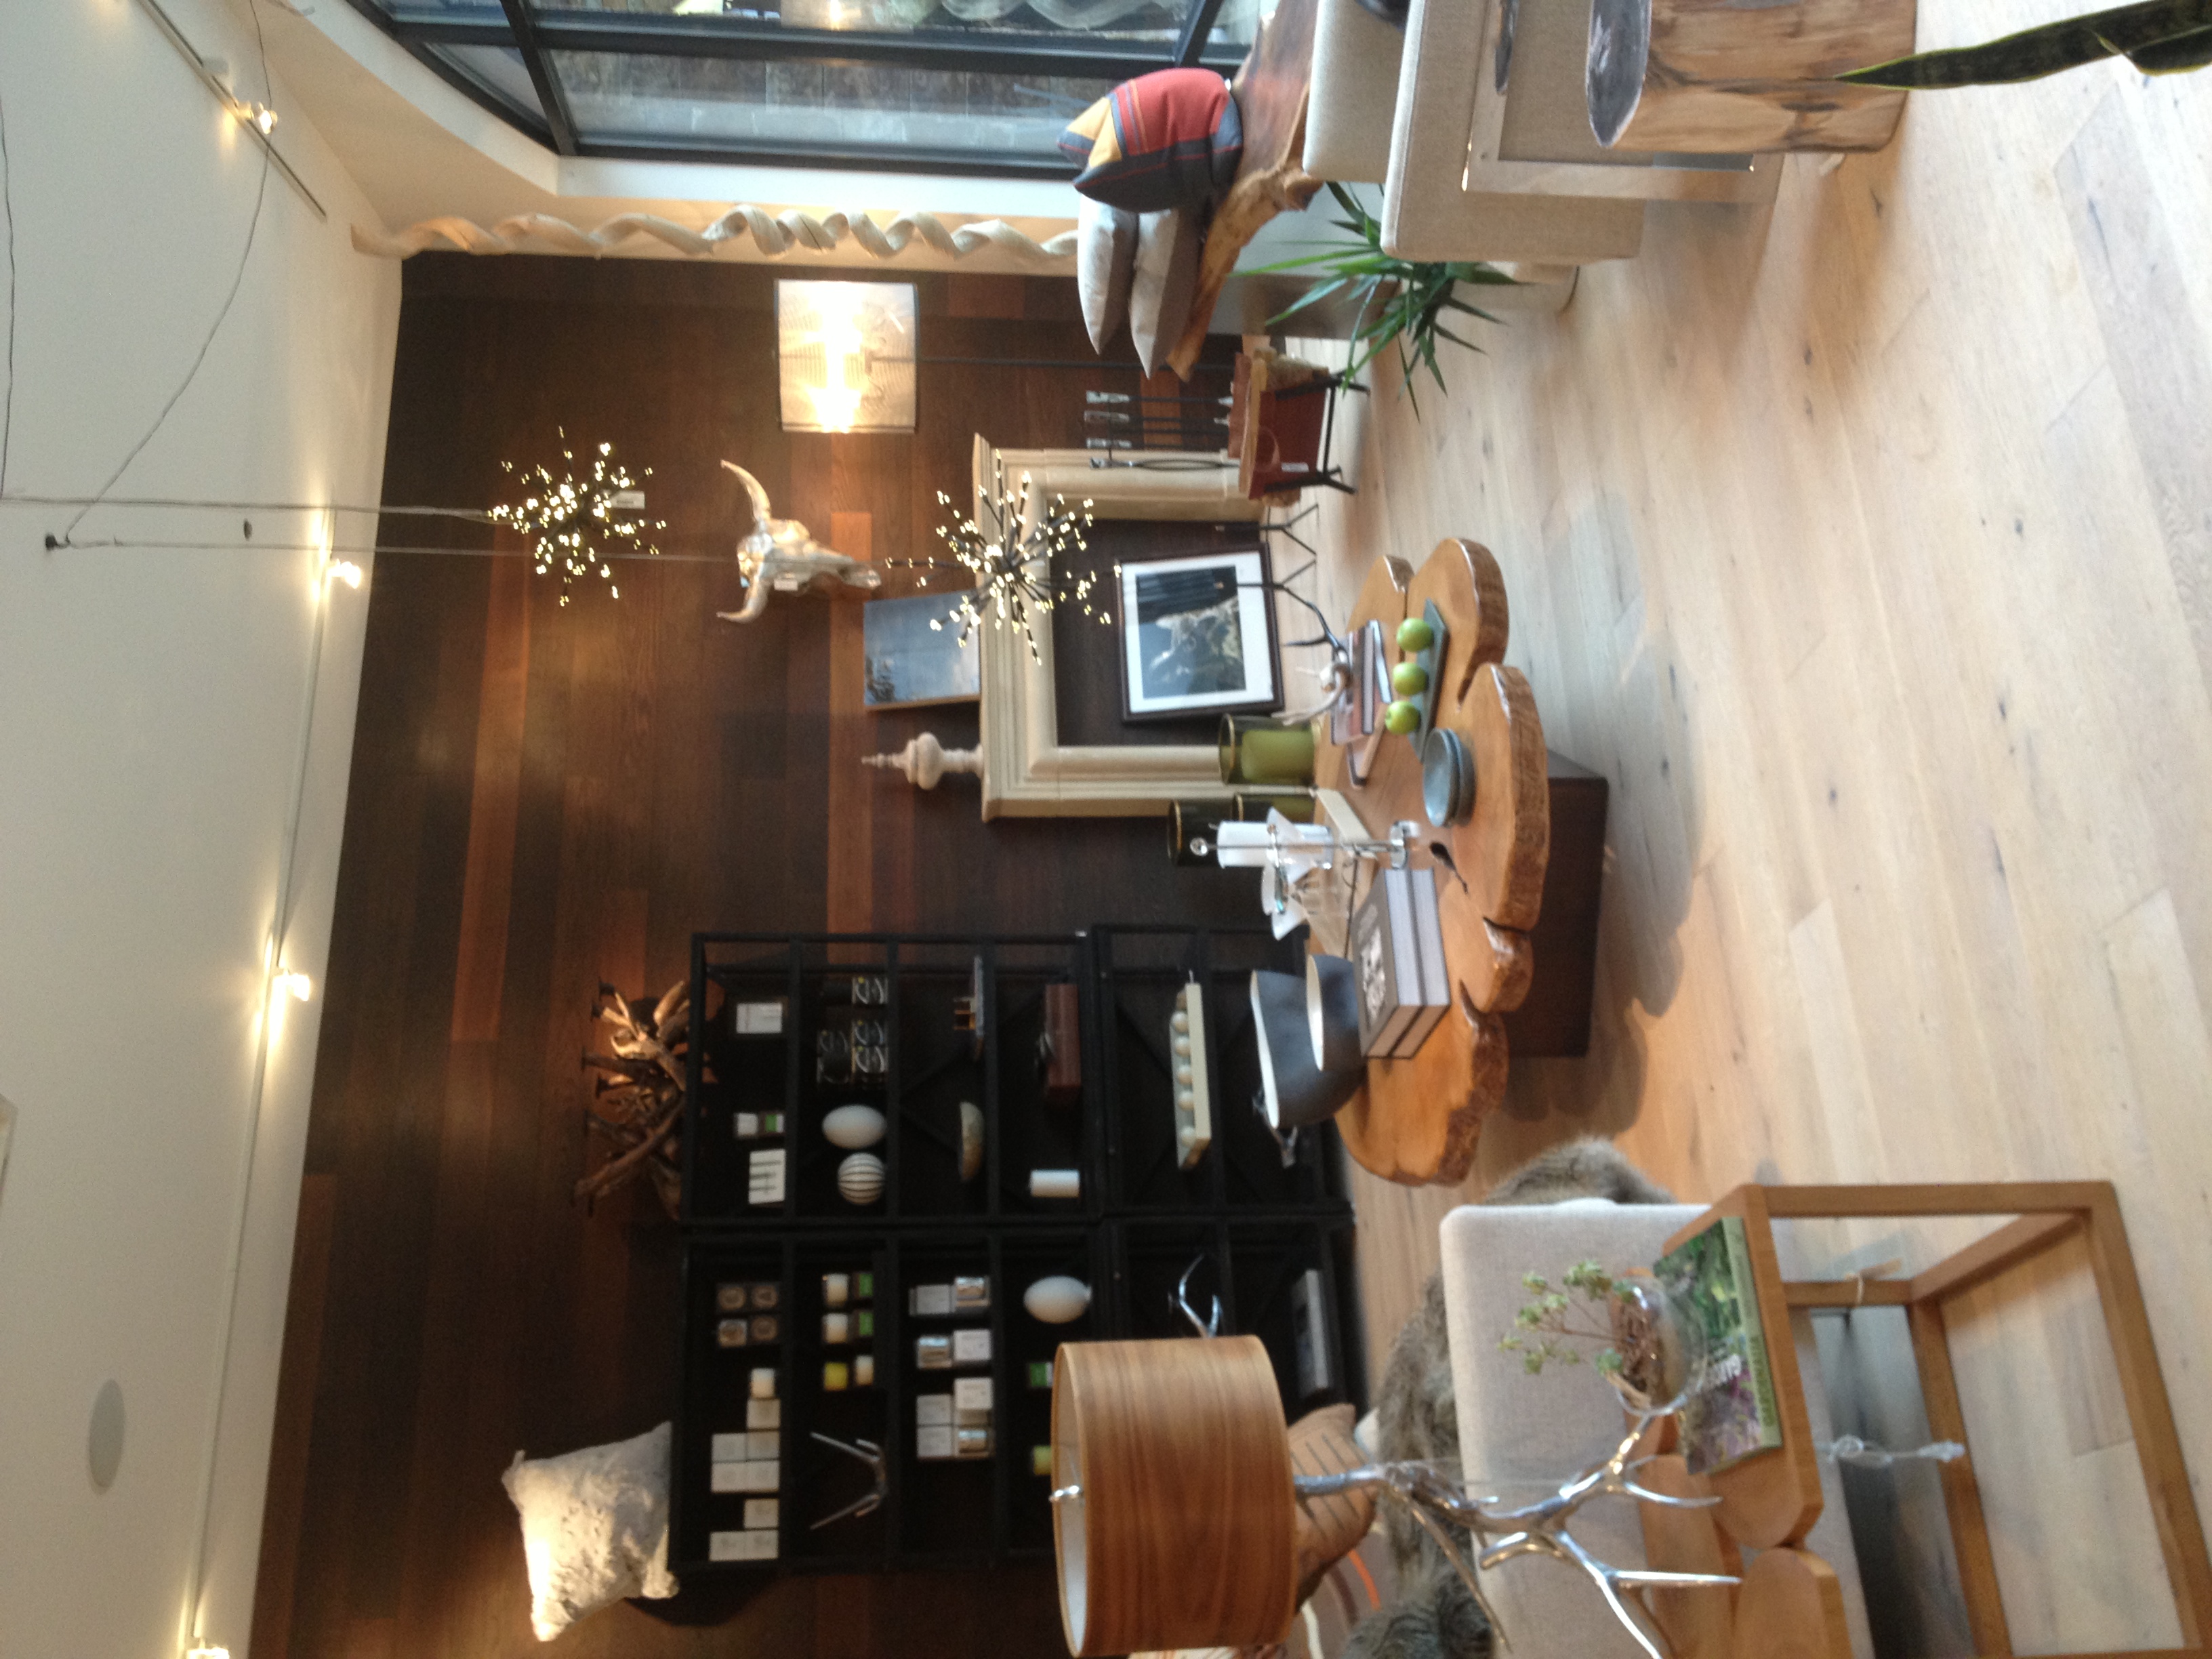
While I was out in Colorado last week, I stumbled across Worth Interiors where I had a total drool fest. It really made me re-consider a lot of the design decisions we were making and inspired me to stick with the furnishings we have while accenting them with some beautiful modern pieces. My urge to go completely retro put me in night sweats of having to change all of our furniture....but was relieved to see that wasn't the case. The warm, wood-sy design is definitely up our alley and with a slight twist with the retro fixtures...I think we have a winner!

Here is a photo from Worth Interiors:

photo (62).JPG

Naturally, I couldn't stop thinking about it on my flight back and had to throw together a mood board for the bathroom before I lost it. We have already purchased our lighting, but you can start to see where the fixtures will tie into the overall design.


Screen Shot 2013-09-22 at 10.10.24 PM.png

The Details: We have selected our tile from the Tile Shop in Grand Rapids. The floor tile will be a wide rectangular grey. The shower will have a glass door so you can see the white subway tile (wall) and pebble floor. Behind the vanity will be Cole & Sons "Woods" wallpaper with sconces mounted on each side. Not 100% on the mirrors, but they are Target:Threshold Captains Mirror. We are keeping the ceilings cathedral, so there will be a skylight installed along with matching chandelier

Angela SatterleeComment
LET THERE BE LIGHT!

I want to first start out by saying how much I LOVE lighting in a home. I did not, however, realize the headache it creates when you are trying to look at your finishes as a whole. It's easy to say I like "this light" and "that light", but when you start pairing sconces, pendants, etc. to a blank canvas...it can be a little frustrating and very, very expensive. 

After extensive thought and planning, I was introduced to the super-talented Jonathan Williams, who happens to know a thing or two about lighting. He generously shared a ton of information and ultimately helped make the decision on the lighting for our kitchen! We also plan to utilize his skills in later lighting projects. Thank you Adam and Amanda Rogalski for a stellar connection! 

As for the fixtures, I was really inspired by a bunch of lighting we couldn't afford even if I sold my right arm, but god damn, they sure are beautiful. I spent almost an entire weekend scouring the webernets and I'm thrilled to say....I think we did it.

We decided on a chrome finish with clear/whites as we (hope) it will be a fresh accent to our mid-century modern look. I am obsessed with retro lighting and hope these will create the "twist" we're going for. 


kitchen.png

Our electricians (K2 Contractors) started on Thursday and have a few things to finish up tomorrow! We were pleased with the progress and are looking forward to the rough-in inspection. They will be back to install these babies when the drywall is complete! 

61854_10100461268980461_309120445_n.jpg
Angela Satterlee Comments
BASEMENT BATTLES

We had originally decided to hold off on the basement (aka man cave), but since it is really open to the rest of the house, we decided to get things rolling. Let me introduce, dumpster No. 3: 

IMG_2227.jpg

We recycled as much of our home waste as we could, but there was still so.much.plaster that needed to go. We thought this was a great opportunity to remove the carpet and ceiling tiles that were holding a massive smoke/cat pee smell in the house and start working on the basement!

Unfortunately, I didn't get a full picture of the ceiling tiles, but you can sort of see them to the left. We started moving some of our furniture upstairs and worked on half of the basement at a time (shifting furniture as we went.)


IMG_2226.jpg

One thing I LOVE about the basement is 1. The Fireplace and 2. Full size windows! It really feels like a part of our house rather than a basement. We haven't fully decided on the finishes, but we're thinking about painting the panelling white ( I really like the texture) or we will drywall. We'd also like to do something fun with the fireplace and paint the ceilings black or white.

We are also debating hardwood floors or carpet since there is asbestos tile that we don't want to mess with. This will definitely be a big hangout spot for us and the only room with a TV.

What are your thoughts?


IMG_2237.jpg

And here is a view from the fireplace looking towards the stairs. I love how the stairs have divided a very awkwardly shaped basement into a main area and a little nook where we can make a small office or something. 

Although plans are still in the air - we are loving how this space is turning out! 

IMG_2238.png
Angela Satterlee Comment
LESSONS IN LANDSCAPING

As you may remember our yard looked a little something like this (only worse by the time we actually took possession of the house): 

Screen Shot 2013-06-02 at 11.19.50 PM.png

After a failed attempt of removing the bushes with hedge shears, my dad educated me on the art of tying bushes to a truck. It was awesome. My bushes made it to a free listing on facebook and are now living happily at a home in Hudsonville. I was glad someone could actually use them!

IMG_2160.JPG

A blank canvas! 

IMG_2158.JPG

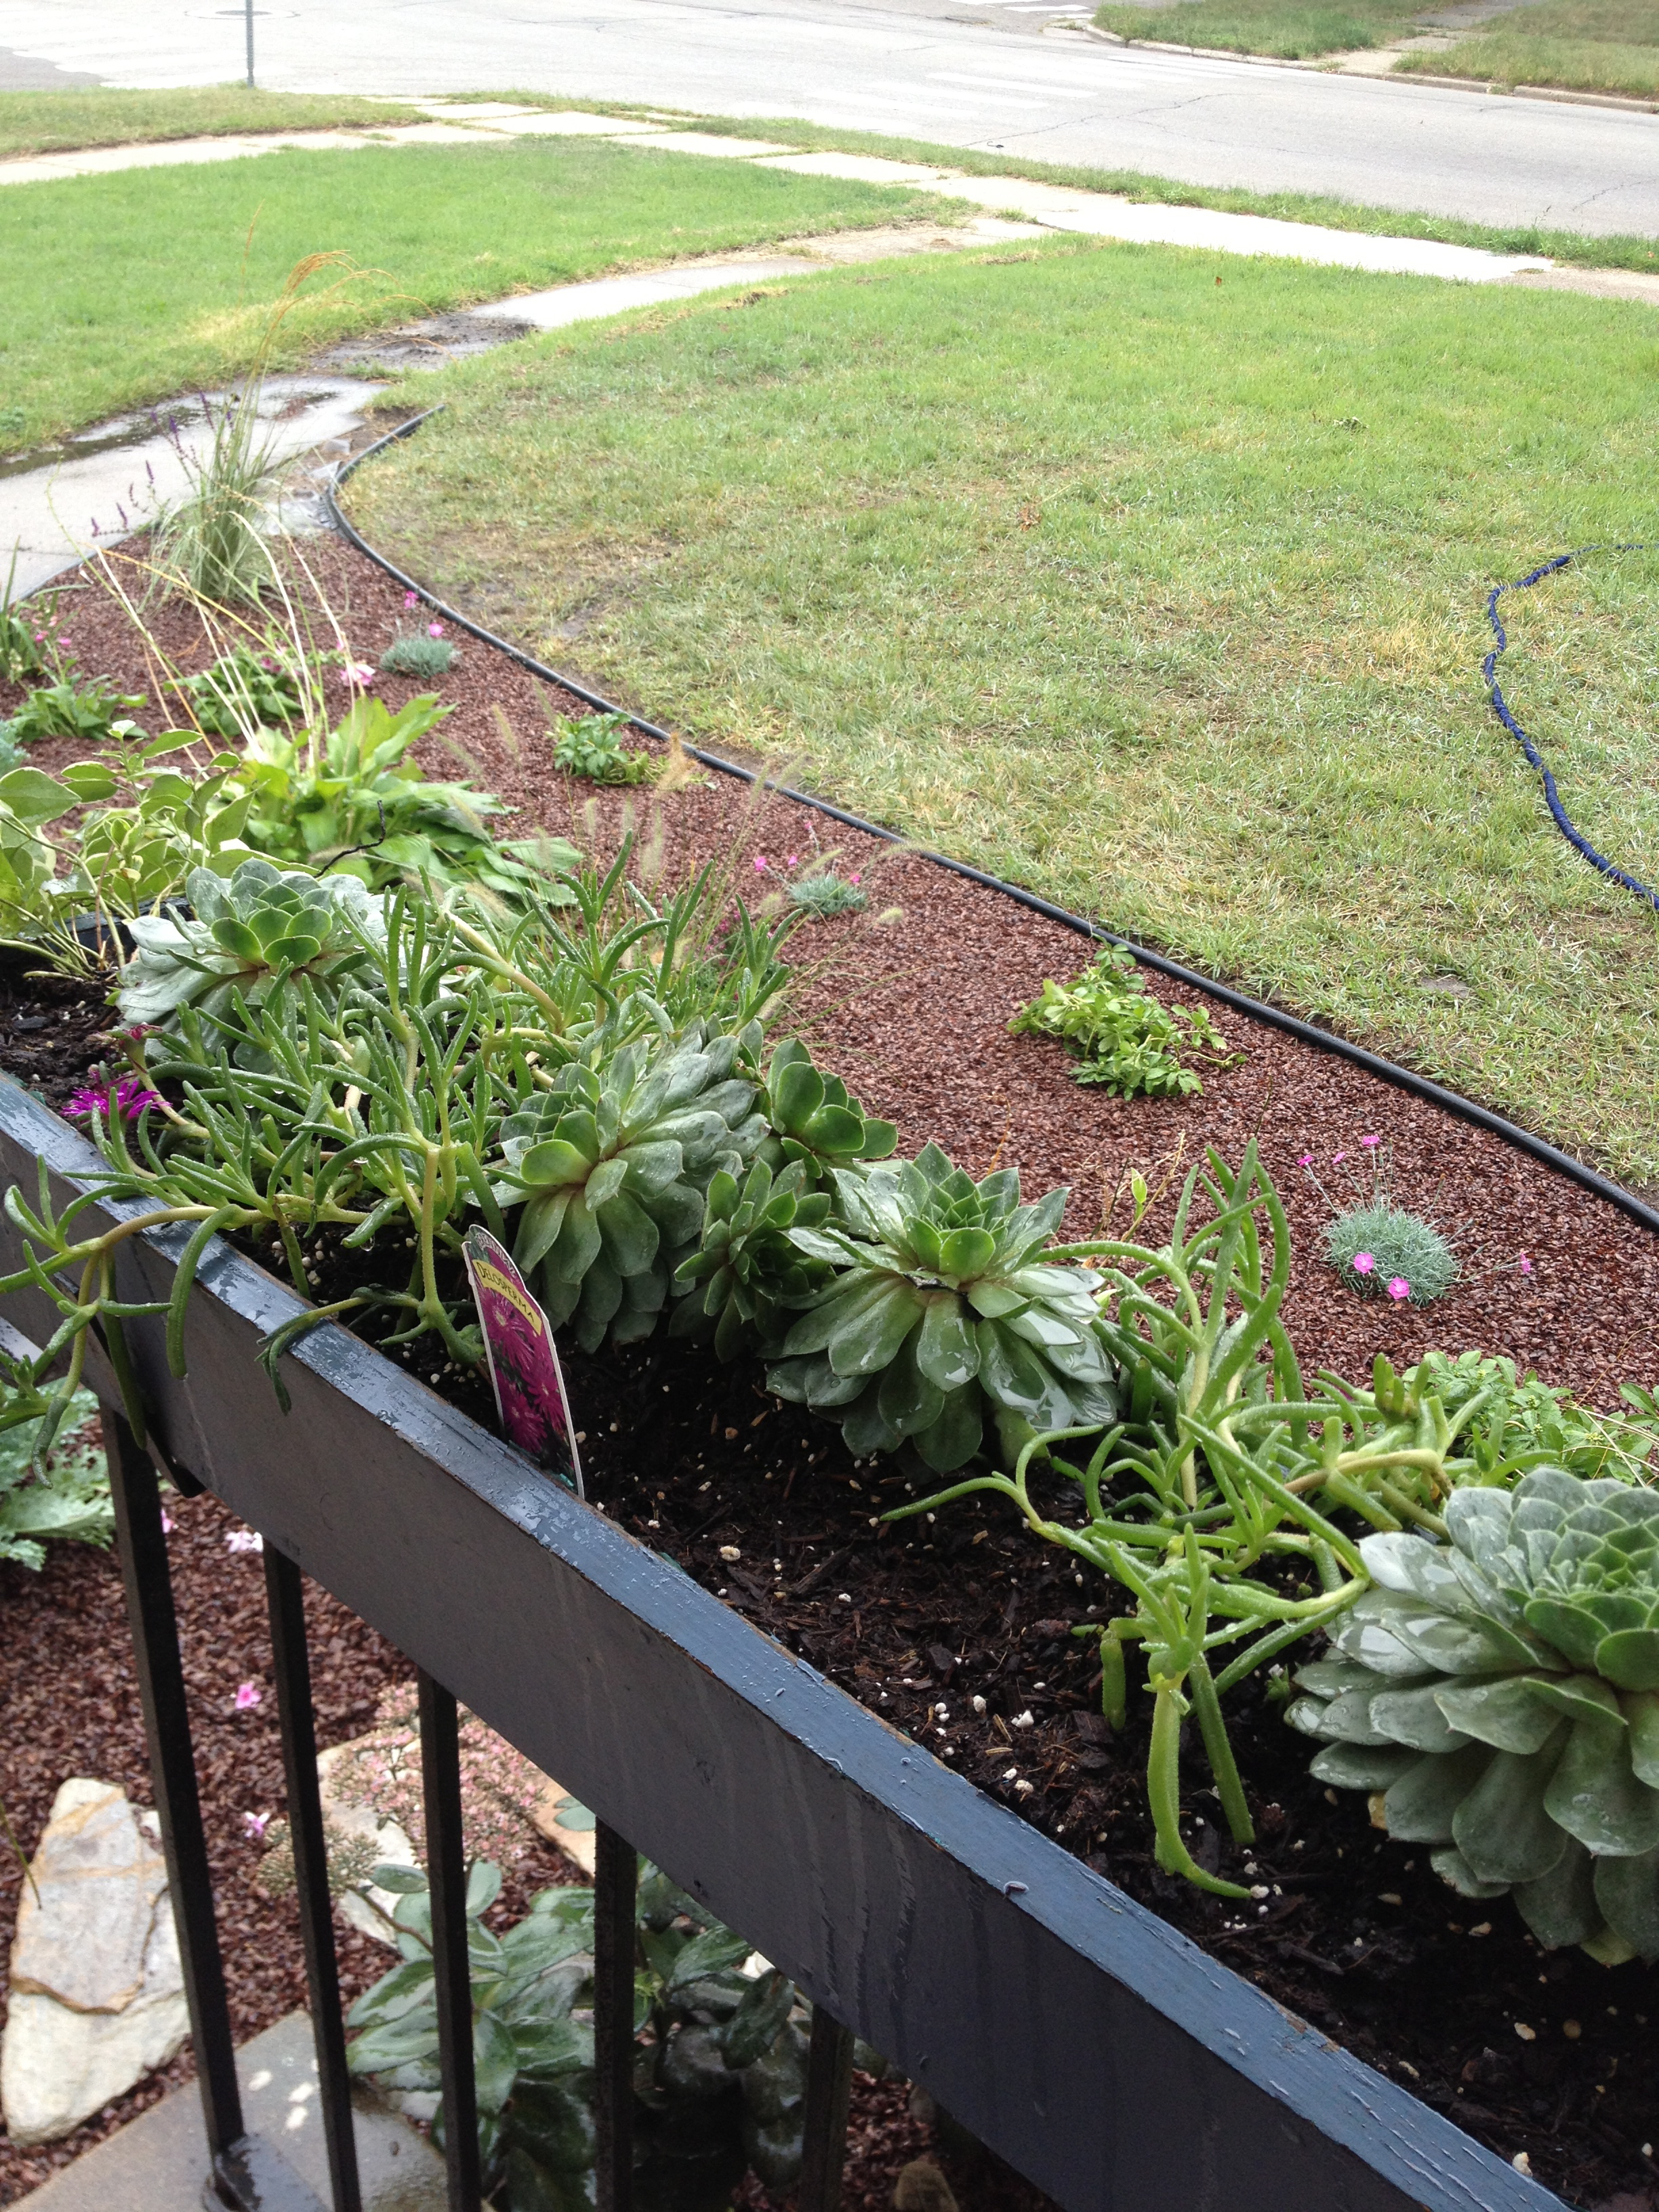
I mentioned in a previous post that my sidekick Ali educated us on how much we would save doing some landscaping this fall and I'm SO glad we listened to her advice. It totally changed the look of our house and certainly saved us big bucks on waiting until spring. 

I spent about two weeks (with major help from Linda and Connie) picking away at this every night. I cannot tell you how many people in the neighborhood I've met and have complemented the change! I especially loved those who lived in the neighborhood for 20+ years who said it has never had landscaping and the grass was always dead. Makes me wonder what they were using the greenhouse in the back for ;) 

We will be adding some trees and shrubs as time and budget allow, but I think it's a great start! 


IMG_2205.JPG
IMG_2206.jpg
IMG_2207.jpg
IMG_2208.jpg

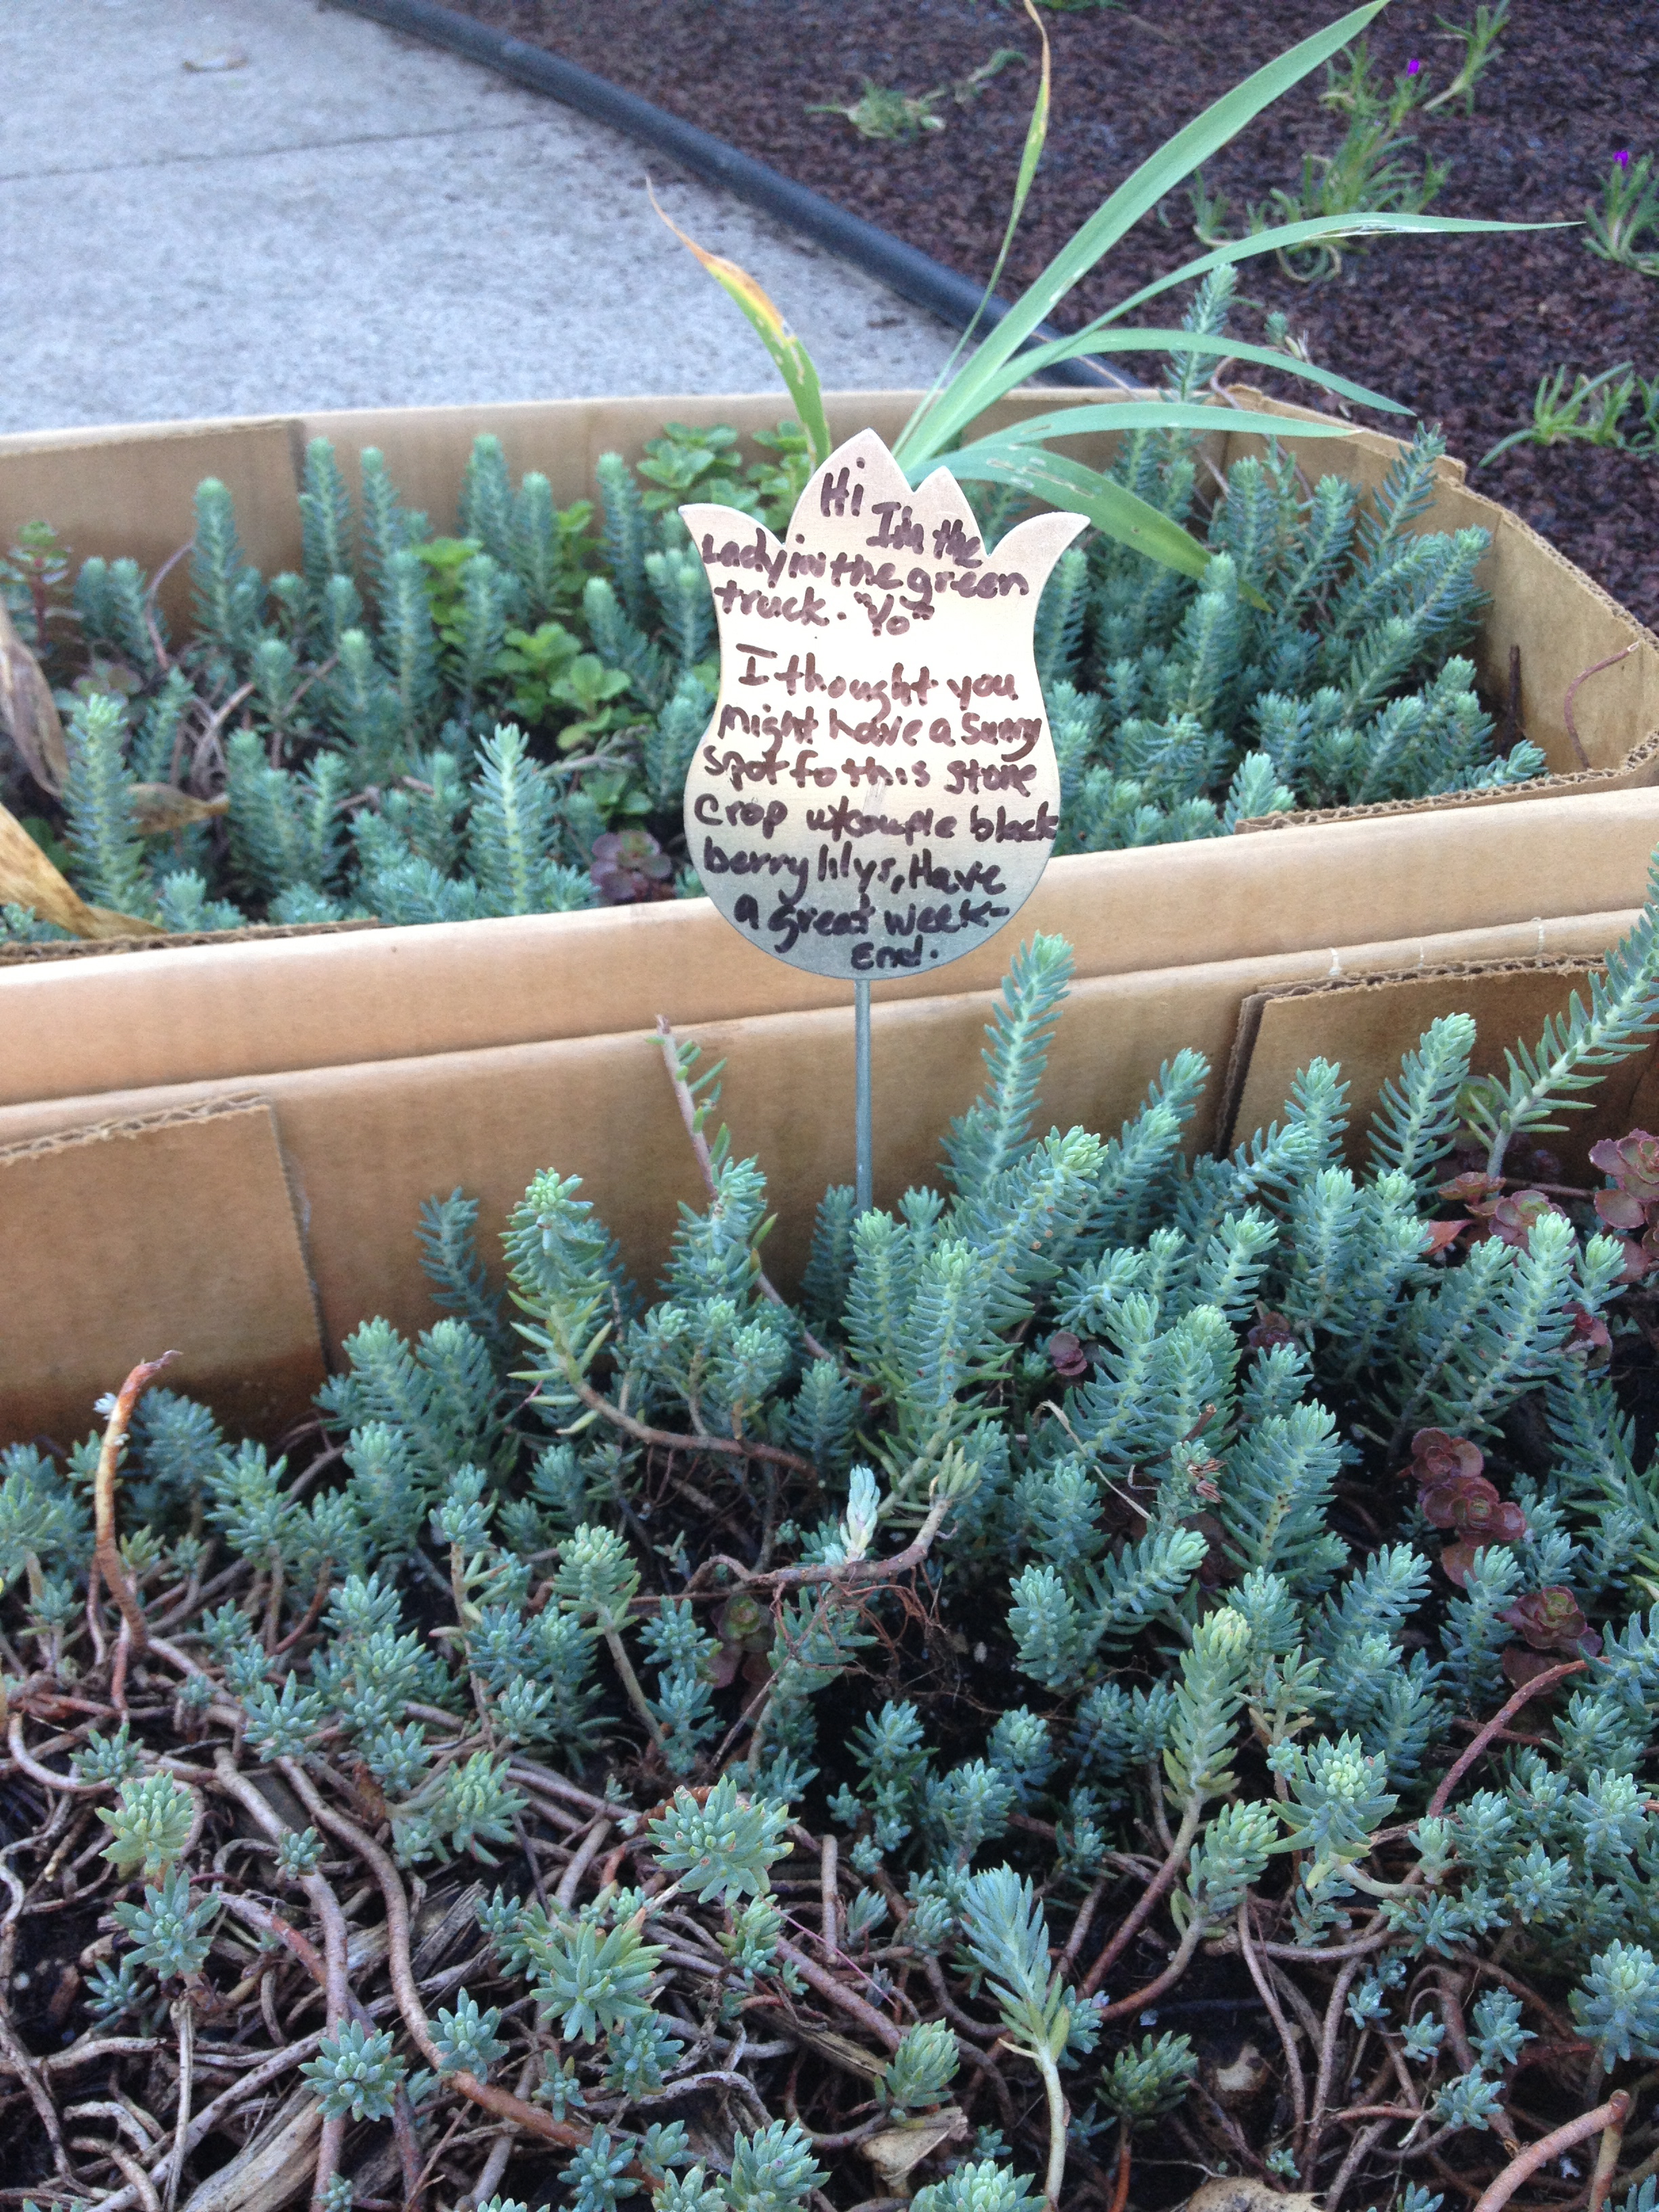
I also think I found the nicest neighborhood in Grand Rapids. Seriously, people are SO nice! This woman happens to drive by our house often and has watched the progress. She literally stops her truck, gets out to introduce herself and goes on and on about how awesome our yard looks! A few days later, I find this box of plants from her on our doorstep. How sweet is that?! 


IMG_2222.jpg
Angela SatterleeComment
HOUSE UPDATE TOUR

After a busy work week and my fall teaching semester in full swing - we're back after a week long house hiatus! Our goal for the weekend was to finish the framing, so my dad and Brandon focused on that while my mom and I tackled the basement. It's really starting to look like a house now, guys.

Here is the kitchen looking in from the sun/dining room. You can see where we have the kitchen layout on the floor with blue tape. A very smart observation was made by my pal, Ali who noticed we had no area for dry food. We are now adding a large built-in pantry to the right of the brick stack.


IMG_2230.jpg

Here is the kitchen facing out towards the living room: 

IMG_2231.jpg

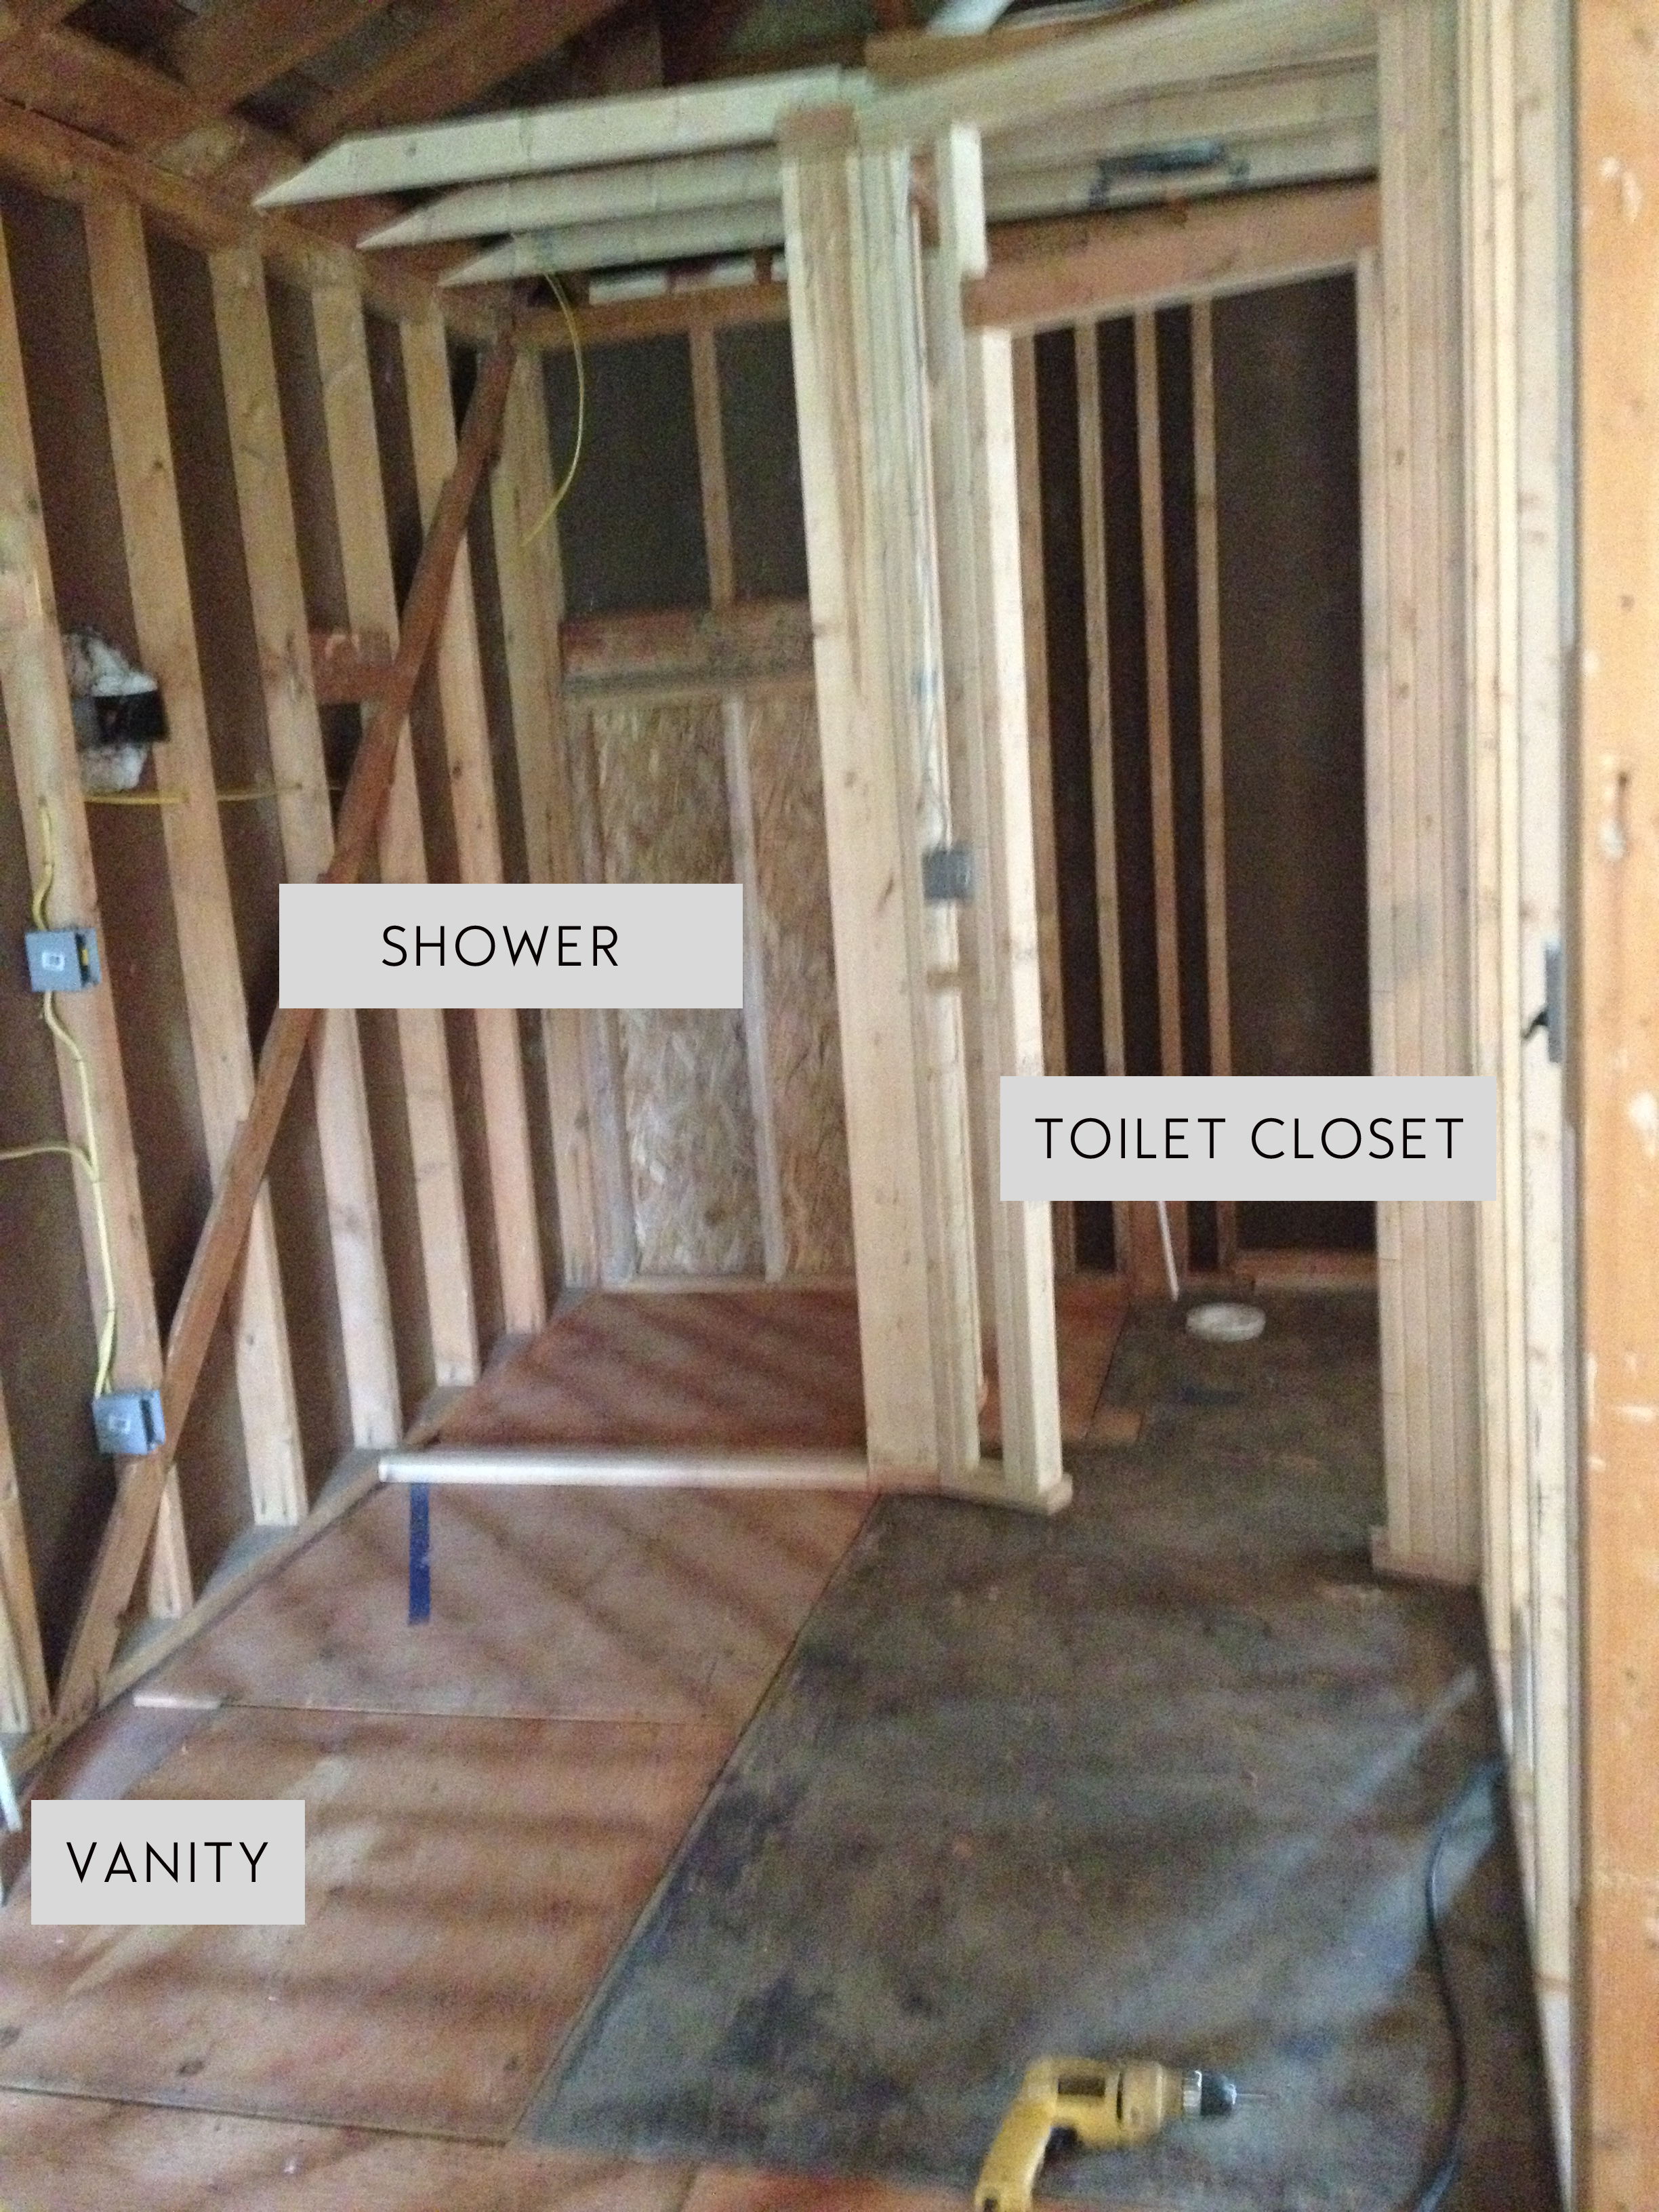
The bathroom! The left far corner will be the shower and the right will be a toilet closet. 

IMG_2233.jpg

We decided to remove the walk-through to the bathroom (from the closet) to allow for for more flexibility with closet layout. 

IMG_2234.jpg

Here is the stairway we added to the living room (looking down to the basement).

IMG_2235.jpg
Angela SatterleeComment
YAY FOR A PRODUCTIVE DAY!

My dad has been a HUGE help during this whole process and I can never find ways to thank him enough. Luckily, he's a very simple man, so I keep the refrigerator stocked and make sure he is fed all day. I've really enjoyed spending lots of time with him and it's been years since we've done something with just him and I. I'm learning a ton and we really work well together on things like this. 

Everyday, he gives Brandon and I "homework" which usually involves something like demo, framing, or cutting. My task yesterday was to remove the old stairs from the basement, so I spent my morning doing that before he go there. Since there is no electricity in the basement besides a small lamp, I didn't take a picture, but it looks SO much bigger! Who knew what 3'x12' could really do. Since I got done a little early, I also removed the carpet from that side of the basement. The previous owners smoked in there at some point after we bought it so everything just reeks. I've been told once the carpet is out it will make a world of difference, so I've been itching to remove it.

One project I have been dreading (and putting off) is removing the ceiling in the closet/bathroom. We discovered on Monday that that stupid wall is actually load bearing, so we need to switch the direction of the rafters in that section to support it. This meant that the ceiling had to come down, which also meant another day of insulation. Ugh.  

We actually got creative this time and I pulled the hose through the window, set it to "mist" and as my dad knocked it down – I misted it with water. I couldn't believe how much of a difference that made! 


photo (52).JPG

We also took down all the existing walls to get things ready for framing. This included more of the ceiling and I was SO excited to see more of the attic. If we didn't live in Michigan...we would love to do some sort of loft, but we have to be really careful with the cathedrals because of insulation and how it will effect the roof and efficiency of the house. We are still deciding on a few things, but so far it's still kitchen and bath. 

photo (50).JPG
photo (51).JPG

While I was at IKEA yesterday, my dad also finished covering the original stairs! That area will now be our bathroom.  Stay tuned for framing tomorrow!

photo (49).JPG